|
|
| |
| |
| |
| |
| |
|
|
| |
| |
| |
| |
| |
FREE Downloads
|
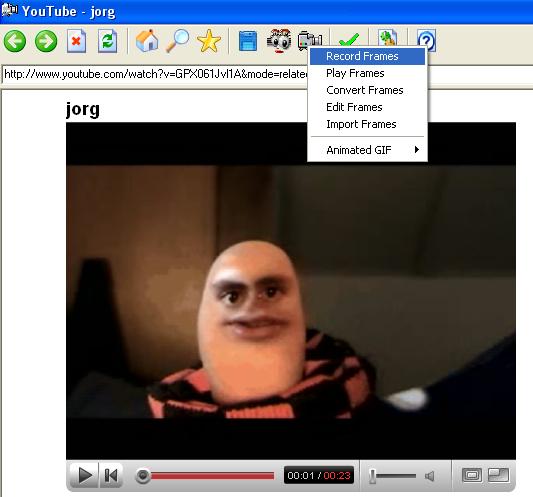
Recording Video Frames You can record video frames from YouTube or any website that displays videos. First select the video you wish to record so that it loads into the Flash video player. Stop the video and click on the Camera icon then select Record Frames.
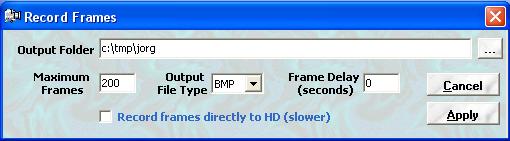
Which opens the following setup form.
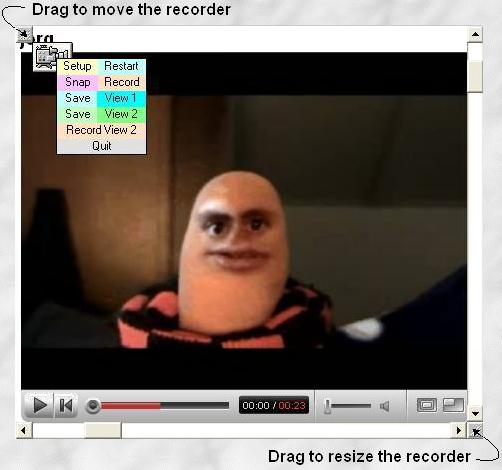
The Output Folder is where your frames will be stored once recording begins. The Maximum Frames number is limited to 10,000. Keep in mind that BMP files require a lot of disk space but they are the only image format that doesn't degrade the image when saved to the harddrive (HD). The Frame Delay is rarely applied when recording since frames can be missed during any delay. Likewise with the option to Record frames directly to the HD, the delayed action can cause frames to be missed. Frames are otherwise stored in memory until the recording is stopped, then written to the output folder. The number of frames that may be stored in memory depends on your PC's available RAM and the size of the files recorded. Recording frames directly to the HD is only limited by the amount of available disk space. Click on the Apply button to commit the settings and close the form. The following borderless form appears which shows a section of the YouTube video webpage containing the video player (View 1). There is a resizing button at the bottom right corner and the top left corner button lets you move the form. You must left click and hold down the mouse button on either of the corner buttons to move or resize the view window. Use the scroll bars to isolate the section of the video you intend to record. Once you've isolated a section of the video, save the view as View 2 so you can return to this view prior to recording.
Click on the Camera icon to open the menu options.
It should be noted that a smaller image view captures frames more efficiently since the frame capture method is limited by the rate at which the images can be stored. Larger images take more space and time to store and the consequence can be dropped frames. Your PC's performance set the limits of the frame capture. Dropped frames and memory overload can usually be overcome by restricting the view window to a cropped section of the video. While recording, the frame count is displayed in the U2Browser title bar and clicking any button on the U2Browser toolbar will stop the recording. After all frames have been recorded or the memory becomes full, the frames are saved to the output folder. The naming convention for frames is 0001.ext to 9999.ext where ext is either BMP or GIF or JPG. For best results, it is recommended to keep the frame size just large enough to capture only the area of interest. This will ensure that all frames are captured and the output files will be as small as possible. This will also ensure that you will not run out of memory before all the frames have been recorded. If you intend to eventually crop the frames, then the sooner the better. This keeps the size of the output files to a minimum and conserves disk space. Frames can also be imported from any alternate video source. Here is a method for turning your DVD Player into a frame splitter application.
|
Steps for Recording Video Frames
|
|||||||||
|
U2Browser Copyright © 2007. All Rights Reserved. |