|
|
| |
| |
| |
| |
| |
|
|
| |
| |
| |
| |
| |
FREE Downloads
|
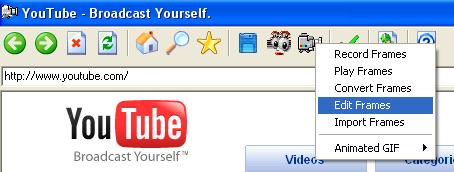
Editing Video Frames The Frame Editor is used to edit single frames. It has no drawing options, only image enhancement tools, aspect tools and color filtering. You can open the Frame Editor by clicking the Camera icon and selecting Edit Frames.
Or you can edit the current frame displayed in the Frame Player by clicking on the Camera icon and selecting the Edit menu item.
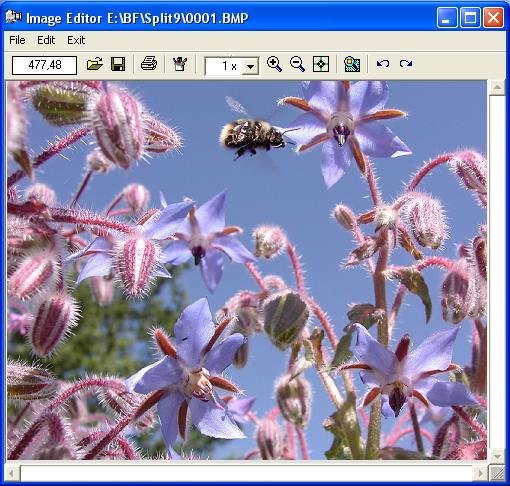
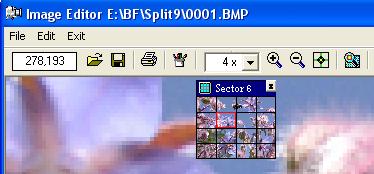
Selecting Edit Frames from U2Browser prompts the user for the name of an image file, which is loaded into the Frame Editor:
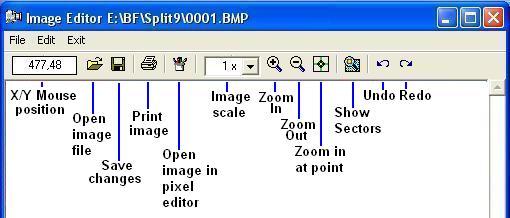
The Tool Bar Described
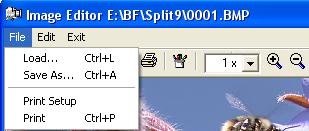
The File Menu Described:
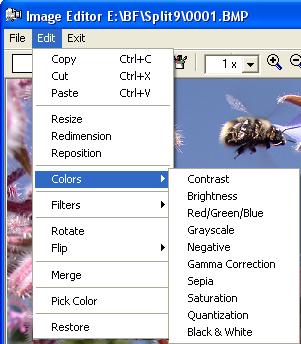
The Edit Menu Described
Clipboard Options
Aspect Adjustments
Color Adjustments
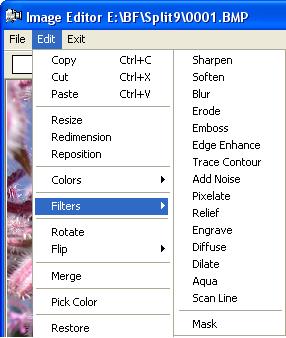
Image Filters
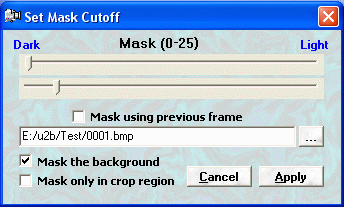
Restore This option restores the loaded image before any changes were made. The Crop Fence The crop fence is a bordered resizable section of the image which is activated by clicking the left mouse button anywhere in the image. A dashed rectangle appears that is anchored at the click point and the opposite corner of the rectangle follows the mouse. Moving the mouse reshapes the rectangle until another left click sets its position, or a right click cancels the operation. Once the fence is set all copy/cut/paste and masking operations apply to the fence region only. Merging Files Two sets of files may be merged by defining a transparency color which allows a portion of one image to show through another. Elements from one frame can be combined with another and merged to a single image. Note that only images that have the same color depth can be merged. For example a 24 bit BMP cannot be merged with an 8 bit GIF file. This option prompts for the name of the file to merge, then the transparency color. The transparency color must be a value between 0 (Black) and 16777215 (White). This color value may also be selected from a color dialog form. You may also use the Pick Color option before the merge to sample a pixel from the current image. This value becomes the default transparency color. If the files have different color depths the merge fails. Pick Color The Pick Color option allows you to read the color of a pixel on the current image. which can be used to define a transparency color for merging frames. The cursor becomes a dropper and the next left click defines the pixel to sample. A right click cancels the operation. Masking Masking is a special filter that allows you to extract dark or light pixels from an image and overlay them on a mask frame or the previous frame in the sequence (if applicable). You can also use masking as a transparency tool to fill in white regions using information from a mask frame or the previous frame. A mask frame can also be used as a background frame. You can also use masking to isolate dark or light pixels from an image. Masking requires setting the cut-off values for the color inclusion. The actual 24 bit color values are mapped to a range of values from 0 (darkest) to 255 (lightest) and they define the pixels to be extracted from the image. These pixels are then superimposed onto a mask image, which can be either the previous frame in the sequence (if applicable) or a user defined image file. If the crop fence is visible and the Mask only in crop region is checked, then only the region within the fence is masked.
For this example a file image is being displayed in the Frame Editor and a mask frame has been defined. When the Mask the background box is checked, a range of the darkest pixels (0-25) on the frame becomes transparent allowing the mask frame to show through. In this case the darkest colors get replaced with the corresponding pixels from the mask frame. This is comparable to the merge function except that a range of dark or light pixels are made transparent instead of a single transparency color. To overlay only the 10% darkest pixels onto the mask frame, set the mask cut-off range to (25-255).Then only the darkest (0-24) pixels will be opaque (not transparent) to the mask frame. If the Mask the background box is unchecked then the roles of the image and the mask frames are reversed. This allows you to overlay the mask frame onto the foreground of the image frame. This is useful for adding text or a logo onto a frame. The mask frame should contain the text against a white background and the mask cut-off should be set to white (255-255). Note that this method re-dimensions the image frame to match the dimensions of the mask frame. It is recommended that you experiment with the Mask feature in the Frame Editor before masking an entire sequence of frames. Here's an example of using the Mask feature to create an animated logo.
Masking is a precursor for frame averaging methods used to enhance poor quality videos. Watch for a FREE future upgrade of the Frame Recorder to include advanced masking tools including frame averaging, and 3D motion analysis.
|
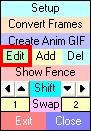
Editing Features
|
|||||||||
|
U2Browser Copyright © 2007. All Rights Reserved. |